Virtual photo booth experiences let your guests scan a QR code, open a simple browser page, and snap branded selfies right from their own phones—no bulky kiosk required. For Indian weddings, corporate events, and hybrid conferences, this mix of mobile web and QR codes is quickly becoming a practical alternative (or powerful add-on) to traditional booths.[1][2]
What Is a Virtual or QR-Only Photo Booth?
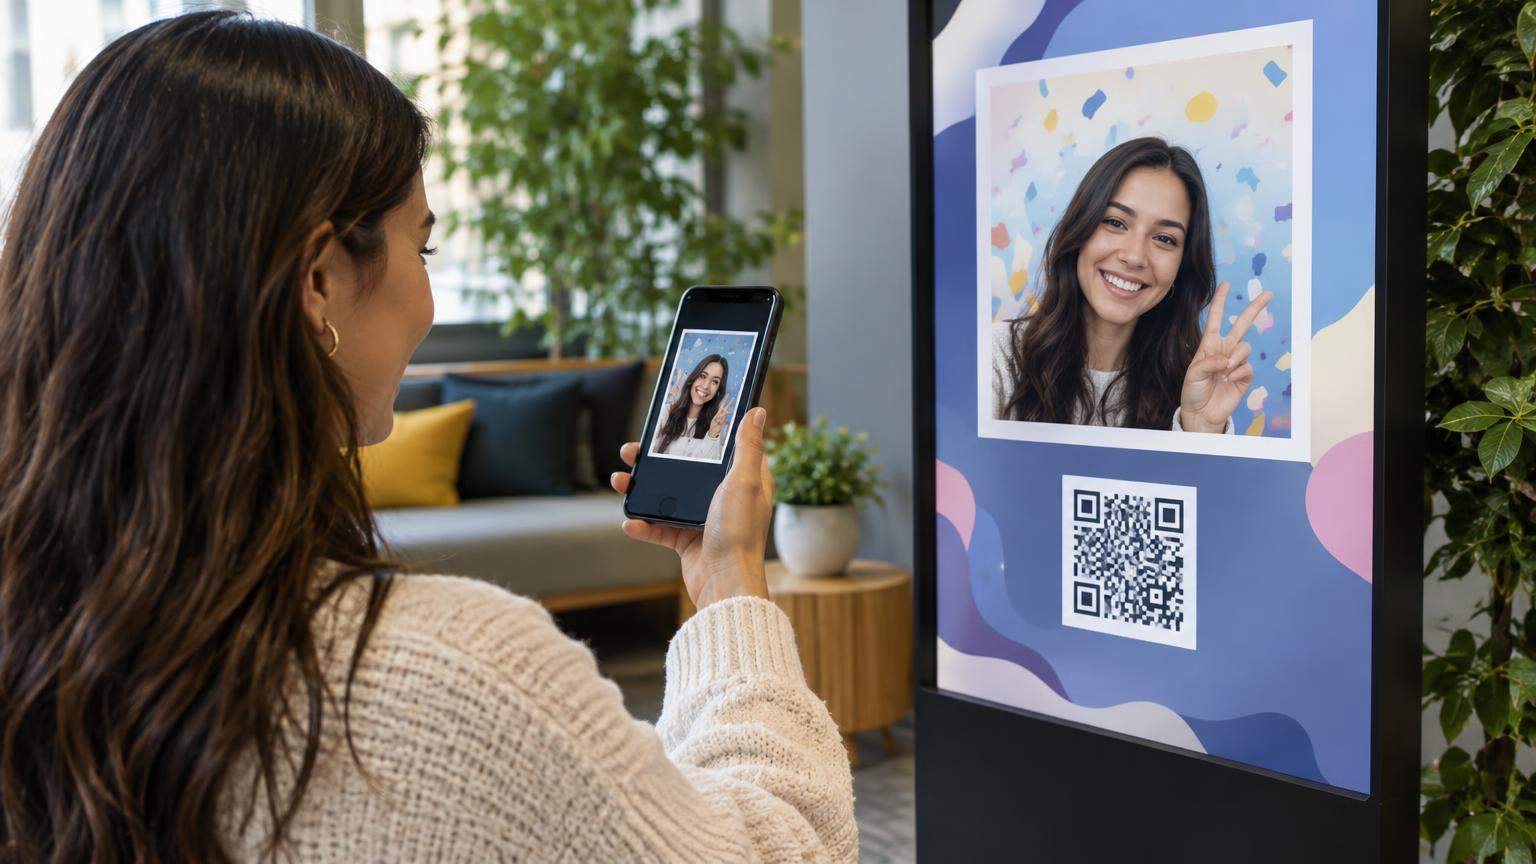
A virtual photo booth is a browser-based experience guests access via a link or QR code on their own phone, tablet, or laptop. They grant camera permission, take or upload a photo, apply event branding or filters, and the final image is saved into a shared online gallery.[1][2]
Providers like Pixilated and Noonah describe this clearly as a “web app” that runs in the browser, with no app download required.[1][2] Platforms such as Cellfy frame it as “the virtual photo booth your guests already carry” in their pockets, accessed in seconds via QR code.[4]
At the same time, many pro photo booth operators still use physical kiosks (DSLR booth, iPad stand, 360 rig) but add QR codes for delivery. In these hybrid or QR-only setups, photos are captured on the kiosk, then a QR code appears on-screen for guests to scan and download to their phone—an option documented in tools like RightBooth and DSLR Remote Pro.[6][7]
To keep terminology clear for this article:
- Pure virtual photo booth – Capture happens on guests’ own devices through a browser link/QR; no on-site camera hardware is required.[1][2]
- Hybrid QR booth – A physical kiosk captures images, but QR codes handle delivery, sharing, or gallery access on personal phones.[6][7]
- QR-only experience – An event touchpoint (standee, table card, product packaging) uses QR codes to send guests into a shared capture/gallery flow, whether or not a traditional booth is in the room.[4][10]
How Virtual Photo Booths Actually Work
Most virtual photo booth platforms follow a similar workflow.[1][2][4]
1. Host sets up the event
From an admin dashboard, you typically:
- Create a new event or campaign.
- Choose options such as stills, GIFs, videos, or boomerangs (if supported).[5]
- Upload your logo, design a template/overlay, and set brand colours.[1][8]
- Configure sharing options (download, email, WhatsApp, social links) and privacy text.[1][10]
The platform then generates:
- A unique event URL (for example,
yourbrand.platform.com/eventname).[1][10] - A QR code that points to the same URL.[4]
2. Guests join via link or QR code
You place the QR code or short link on:
- Welcome standees or table cards at weddings and receptions.
- Conference lanyards, banners, or stage screens.
- Emails, WhatsApp groups, or virtual event chat for remote attendees.[1][3]
Guests scan the QR code with their camera app or tap the link in a browser. Because the experience is web-based, they do not need to install any app, which vendors emphasise as a key benefit for mixed-device audiences.[1][2][10]
3. Capture on the guest’s own device
The virtual booth page typically:
- Asks for camera permission, or offers an “Upload from gallery” option.[1]
- Shows simple on-screen controls to flip between front and rear cameras.
- Lets the guest re-take the shot until they are happy.
Some platforms also support short video clips, boomerangs, or AI-generated styles and caricatures; a few combine this with virtual audio guest books for spoken messages.[5]
4. Apply branding, overlays and effects
Once a guest confirms their image, the platform automatically applies your preconfigured artwork:
- Logo placement and event name.[1][8]
- Frames, overlays, or themed templates (e.g., wedding monograms, Diwali patterns).[1]
- Filters, colour grading, or AI art styles (where supported).[3]
Vendors highlight that every output is “professionally designed” or “instantly branded,” turning casual selfies into consistent campaign content.[1][8]
5. Save to gallery and share
The final image is then:
- Saved automatically into an event-wide online gallery.[1][10]
- Available for the guest to download or share directly.
- Optionally streamed to a live wall, slideshow, or mosaic at the venue.[2]
Platforms like PixiWeb and Pixilated describe creating a dedicated “event photo gallery website” that guests can browse during or after the event.[1][10]
When Virtual Booths Beat Physical Kiosks (and When They Don’t)

Virtual photo booth tools are not a full replacement for physical setups in every situation. Each approach has strengths.
| Scenario | Virtual / QR-Only Booth | Traditional Physical Booth |
|---|---|---|
| Audience location | Works for guests anywhere in the world via link/QR; great for hybrid or fully remote events.[2][3] | Best for guests physically present at the venue. |
| Logistics | No shipping or heavy hardware; just configure the web app and print/display QR codes.[1][4] | Requires transport, set‑up, power, and often an attendant. |
| Photo quality | Depends on each guest’s phone, lighting, and camera skills. | Controlled lighting, backdrop, and pro cameras (often DSLR) for consistently high image quality.[7] |
| Guest flow | No single queue; everyone can participate from their own device at the same time.[8] | One or a few stations create a physical queue—but this can also act as a visible attraction. |
| Decor / “wow” factor | More subtle; relies on on-screen experiences and live walls. | The booth itself (backdrop, props, lighting) is part of the decor and guest experience. |
| Budget and lead time | Can often be set up quickly and remotely, potentially with lower onsite costs.[1][3] | Generally higher cost per event due to hardware, staff, and logistics.[9] |
In practice, many operators in India and elsewhere now offer both options:
- A hero physical booth (DSLR or 360) for premium shots and decor.
- A virtual or QR-only booth to include remote guests, cover side areas, or extend the experience before and after the main event.[2][3]
Technical Basics: Links, Domains, QR Codes and Landing Pages
Event links and domains
Most virtual photo booth platforms give you a unique event URL that looks like a mini website with capture and gallery in one place.[1][10] Some also offer white-labelling or custom subdomains on higher tiers so agencies can hide third‑party branding.[1]
Practical setup tips:
- Keep the URL short and readable (this helps when guests type it manually).
- Test the link on Android, iOS, and laptop browsers.
- Check performance on both fast Wi‑Fi and slower 4G connections, which are still common across Indian venues.
QR code best practices
Event-tech providers consistently push QR codes as the main entry point.[2][3][4]
For smooth scanning:
- Use high‑contrast black-on-white codes in PNG or SVG format.[4]
- Print them at generous sizes for distance scanning on standees and backdrops.
- Place multiple copies—registration desk, bar, table tents, and near the dance floor—to avoid crowding.[2]
- Always include a short URL under the code for guests whose cameras struggle with scanning.
Some kiosk software goes further by displaying a QR code after capture, so guests can pull their photo onto their own phone.[6][7] This is extremely useful in corporate, government, or mall environments where you do not want to send content via email or unmanaged messaging apps.
Designing the landing page
Your landing page is the first thing guests see after scanning the QR code. Vendors typically allow you to customise:[1][10]
- Logo, header image, and background colour or pattern.
- Intro text and simple instructions (often 2–3 short steps).
- Language (some let you localise text for different regions).
- Legal or privacy wording, which many corporate clients pre-approve.[5]
For an Indian audience, consider bilingual or trilingual instructions (for example, English + Hindi + local regional language) and keep text light; icons plus one-line steps usually work best on smaller screens.
Designing On-Brand Virtual Experiences
Overlays, templates and layouts
Event and SaaS-style platforms let you pre‑configure the visual output.[1][8][10]
Key options usually include:
- Photo layouts – single image, 2-up strip, 4‑photo grid, story-oriented portrait.
- Overlays and frames – your logo, event name, date, and themed graphics (e.g., mehndi patterns for sangeet, brand motifs for product launches).[1][8]
- Backgrounds – solid colours, textures, or virtual backdrops (sometimes powered by background removal or AI).[3]
Because guests shoot on their own phones, you cannot fully control lighting or framing. Strong, bold overlays help unify the visuals so the gallery still feels like one cohesive campaign.
Prompts and guidance
Vendors serving corporate clients often plan the full “guest journey” copy in advance—welcome screen, consent prompt, pose suggestions, and sharing CTA—then get this approved along with privacy language.[5]
For higher engagement:
- Keep instructions to three clear steps: “1. Scan, 2. Snap, 3. Share.”[3]
- Add optional prompt text like “Show us your best ‘Desi Office Party’ pose” or “Hold your badge and smile.”
- If your event has multiple zones (e.g., conference stages, breakout rooms), consider different prompts for each QR code printout.
Filters, AI styles and special formats
Some virtual photo booth and related platforms now support:
- Photo filters and colour grading (e.g., black-and-white, vintage).[1]
- Boomerangs and GIFs for more playful captures.[5]
- AI-based stylisation such as caricatures or themed art styles, especially in newer “memory hub” and mobile-first experiences.[3]
These features can be engaging, but consider:
- Processing time and bandwidth, especially with AI effects on weaker networks.
- Brand alignment—avoid gimmicky styles that clash with a serious conference or luxury wedding.
- Clarity in your consent text if you are using AI transformations on guest photos.
Hybrid Use Cases: Conferences, Remote Teams and Multi-City Campaigns
Virtual photo booths shine when you need to connect people across locations.[2][3][5]
Conferences and trade shows
Platforms like Noonah and OutSnapped promote their browser-based booths as ideal for hybrid events, where on-site and remote attendees can join the same gallery.[2][3]
Practical examples:
- Place QR codes on session slides and stage screens so delegates can participate between talks.
- Embed the virtual booth into the official event app or web portal using an iframe or link integration, as some providers support.[1]
- Display a live wall or mosaic in the lobby so photos from all cities and remote attendees appear together.[2]
Remote and distributed teams
For virtual offsites, all-hands meetings, or festival celebrations across Indian and global offices, a virtual photo booth lets employees contribute photos without shipping hardware to every location.
Use cases include:
- Diwali or Holi dress-up contests where staff submit photos from home.
- Onboarding weeks where new hires share introduction selfies that go into a welcome mosaic.[3]
- Annual meetings where remote and on-site staff appear together in a single branded gallery.[2]
Multi-city and long-running campaigns
SaaS-style platforms such as PixiWeb emphasise reusable campaign setups; one configuration and link can run across multiple venues and dates.[10]
For brand activations in India (malls, campuses, retail chains), this means you can:
- Print the same QR code on standees in different cities.
- Track participation and content centrally via one dashboard.
- Rotate artwork or prompts mid‑campaign without reprinting codes, as long as the URL stays the same.[10]
Managing Galleries, Moderation and Sharing
Event galleries and live displays
Virtual booth providers typically generate an online gallery per event where all approved photos appear.[1][10]
Available features often include:
- Grid view galleries guests can open on their own devices.
- Slideshow or “cloud wall” modes for venue screens, with automatic updates as new images arrive.[2]
- Mosaic builders that assemble photos into a branded shape or logo in real time.[2]
For Indian weddings and Sangeet nights, projecting this live wall near the dance floor is a simple way to drive more participation—guests want to see themselves on the big screen.
Moderation and content control
Marketing pages rarely reveal full moderation tooling, but enterprise-focused providers emphasise that flows and privacy text are pre‑approved, implying stronger control options.[5]
When you evaluate a platform, ask specifically about:
- Pre-approval queues – Can an admin approve or reject photos before they appear publicly?
- Blocklists and reporting – Can guests flag content, or can you block certain words in captions?
- Private vs public galleries – Can you keep the gallery accessible only via private link or PIN?
- Data retention – How long are photos stored, and can you bulk-delete after the event?
These questions matter even more for corporate events and for any function involving minors.
Download and sharing options
Almost all platforms highlight easy sharing as a key benefit, offering combinations of:[1][3][8]
- Direct download to device.
- Email or SMS with a personalised link.
- Share buttons for major social platforms.
Hybrid QR workflows in kiosk software additionally show a QR for each finished print so guests can instantly pull the image onto their phone without typing an email address—useful in quick-turn environments like exhibitions or college fests.[6][7]
Pricing Models: Per-Event, Subscription and Usage-Based
Public pricing for virtual photo booths is often hidden behind “Book a demo” forms, but available information and community discussions indicate a few common structures.[1][3][9]
Per-event or per-campaign
Many providers sell access on an event basis: you set up one campaign that stays active for a fixed time window, with limits on submissions or features depending on the tier.[1][8]
This model is suited to:
- Weddings and private functions.
- Single conferences or brand launches.
- Festive parties where you only need the booth for a week or weekend.
Subscriptions for agencies and regular users
Platforms that describe themselves as “campaign builders” or “mobile-first experiences” often target agencies and corporate teams, suggesting monthly or annual subscriptions.[3][10]
A subscription may include:
- A set number of active events per month.
- Higher limits on photos or videos.
- White-labelling, custom domains, and deeper analytics.
Usage-based and AI-focused pricing
Developers building AI-powered photo booths sometimes charge per processed photo or per bundle of credits, as described in photobooth creator discussions.[9]
This pattern is likely to spread as more platforms offer GPU-intensive features such as AI art or background replacement; it lets hosts pay in proportion to actual usage rather than a flat event fee.
For Indian readers, it is best to treat any online price as a reference point, then request an INR quote from the vendor or local partner, considering taxes and payment options.
Accessibility, Privacy and Age-Appropriate Use
Accessibility and device diversity
Because virtual photo booths run in the browser, they are inherently cross‑device and generally do not require guests to install anything.[1][2][10]
To keep the experience accessible:
- Use large buttons and high-contrast colours.
- Minimise text; support local languages wherever possible.
- Offer an “Upload photo” option for guests whose browser blocks camera access or who prefer not to use it.
Data protection and consent
Virtual photo booths collect personal data: images of faces, sometimes names, email addresses, and usage logs. Vendor marketing materials note that privacy language is often prepared and approved ahead of time, especially for corporate clients.[5]
If you operate in or target India, you should:
- Explain clearly what data you collect, why you collect it, and how long you keep it.
- Obtain explicit consent for using photos in marketing materials, if that is your intention.
- Review the platform’s privacy policy and data storage locations to ensure they align with local regulations and your organisation’s policies.
- Consult legal or compliance advisors on how India’s Digital Personal Data Protection Act 2023 (DPDP Act) may apply to your specific use case.
Events with children and families
Discussions around AI and virtual photo booths for children’s birthday parties highlight the need for extra care when minors are involved.[9]
Practical safeguards include:
- Collect parental consent as part of event registration or invitation.
- Disable public galleries; instead, share private links to parents only.
- Avoid using children’s images in public marketing without explicit written permission.
- Enable moderation so organisers can review content before it is visible to others.
Promoting a Virtual Booth So Guests Actually Use It
Even the best-configured virtual photo booth fails if guests never open it. Providers and event operators highlight a few effective tactics.[1][2][3]
- Pre-event seeding – Include the link/QR in invitations, reminder emails, or WhatsApp groups so guests can try it before the event day.[3]
- Clear, visible signage – Use simple, action-focused text near QR codes, such as “Scan • Snap • Share.”[3]
- Live walls for FOMO – Project the gallery or mosaic on a large screen so people see others’ photos and want to join.[2]
- MC or host call-outs – Ask the emcee or anchor to announce and explain the booth during programme breaks.
- Rewards and contests – Offer small prizes for the most creative photo, best team entry, or early participants, especially in corporate settings.
Checklist: Launching Your First Virtual Photo Booth
Use this step‑by‑step list to plan a simple but professional virtual or QR-only booth.
- Decide the format
Do you need pure virtual (for remote teams), onsite QR-only (for a physical event), or hybrid with a physical kiosk plus QR download?[2][6] - Choose a platform
Look for browser-based access, QR entry, branded templates, galleries, and reasonable moderation and privacy controls.[1][4][10] - Set up your event
Create the campaign, configure capture types (photo/GIF/video if available), and upload your branding assets.[1][5] - Design the guest journey
Write short instructions, configure language options, and add consent/privacy text approved by your client or legal team.[5] - Generate and test QR codes
Download the QR code, print sample versions, and test across a mix of Android/iOS phones and network conditions common in your venues.[2][4] - Plan signage and promotion
Decide where codes will appear (stage screens, standees, lanyards, table tents) and prepare any MC scripts or slide content.[1][3] - Configure gallery and moderation
Choose whether your gallery is public or private, set up live walls or slideshows if needed, and enable any approval filters offered.[2][10] - Run a rehearsal
Invite colleagues or friends to try the full flow. Check for browser permission issues, slow uploads, or confusing steps and refine your copy or settings before going live. - Monitor during the event
Have someone keep an eye on submissions, approve content if required, and gently promote the booth whenever engagement dips. - Close and follow up
After the event, export the gallery if needed, apply your retention policy, and share highlight reels or mosaics with clients or guests.[1][10]
Frequently Asked Questions
Do I still need a physical booth if I use a virtual photo booth?
Not necessarily. For remote teams, hybrid events, and budget-conscious gatherings, a virtual photo booth on guest phones can be enough.[2][3] For decor-heavy weddings, premium brand activations, or where controlled lighting is critical, many organisers still prefer a physical kiosk, sometimes combined with a virtual or QR-only experience.[7]
Will a virtual photo booth work with slow mobile data?
Virtual booths are designed for mobile web use, but performance depends on file size and network strength.[1][10] To support slower 4G connections, keep overlays light, limit video length, avoid very heavy AI effects, and encourage Wi‑Fi use where available.
Can guests join from outside India?
Yes, if your platform is accessible globally and not geo‑restricted. Providers promote virtual booths specifically as a way to connect guests “wherever they are,” as long as they have browser access and a reasonable internet connection.[2][3]
How long should I keep the virtual booth live?
Many campaigns stay open before, during, and after events so people can upload at their convenience.[3][8] In practice, organisers often open access a few days before and keep it live for a short window after, then close the link and archive the gallery according to their data policy.
What about security and inappropriate uploads?
Control varies by platform. Some services support moderation queues or private galleries,[2][5] while others are more open. If your event is sensitive (corporate, government, or child-heavy), choose a platform with approval workflows and clearly explain rules in your terms and signage.
Disclaimer
This article provides general information about virtual photo booth and QR-only experiences based on vendor documentation and community sources.[1][2][4][9] It is not legal, financial, or technical advice. Features, pricing models, and regulatory requirements (including India’s data protection rules) can change, and individual platforms differ. Always review the latest documentation from your chosen provider and consult qualified legal or compliance professionals before relying on any virtual booth system for sensitive or large-scale events.
Sources and Further Reading
Primary and supporting references. Verify time-sensitive information at the original publisher.
- Virtual Photo Booth — pixilated.com
- Pocket Booth — noonah.com
- Mobile First Experiences — outsnapped.com
- Source Document — cellfybooth.com
- Virtual Photo Booth Audio Guest Book — hazielevents.com
- RightBooth0 — www.airevalleysoftware.com
- DSlrRemotePro — dl.breezesoftware.com
- Virtual Photo Booth — syracusepicturebooth.com
- Photo Booth Rental Is A Really Interesting Side — www.reddit.com
- Home — www.pixiwebapp.com
Research date: October 18, 2026 (UTC). Links may change.